

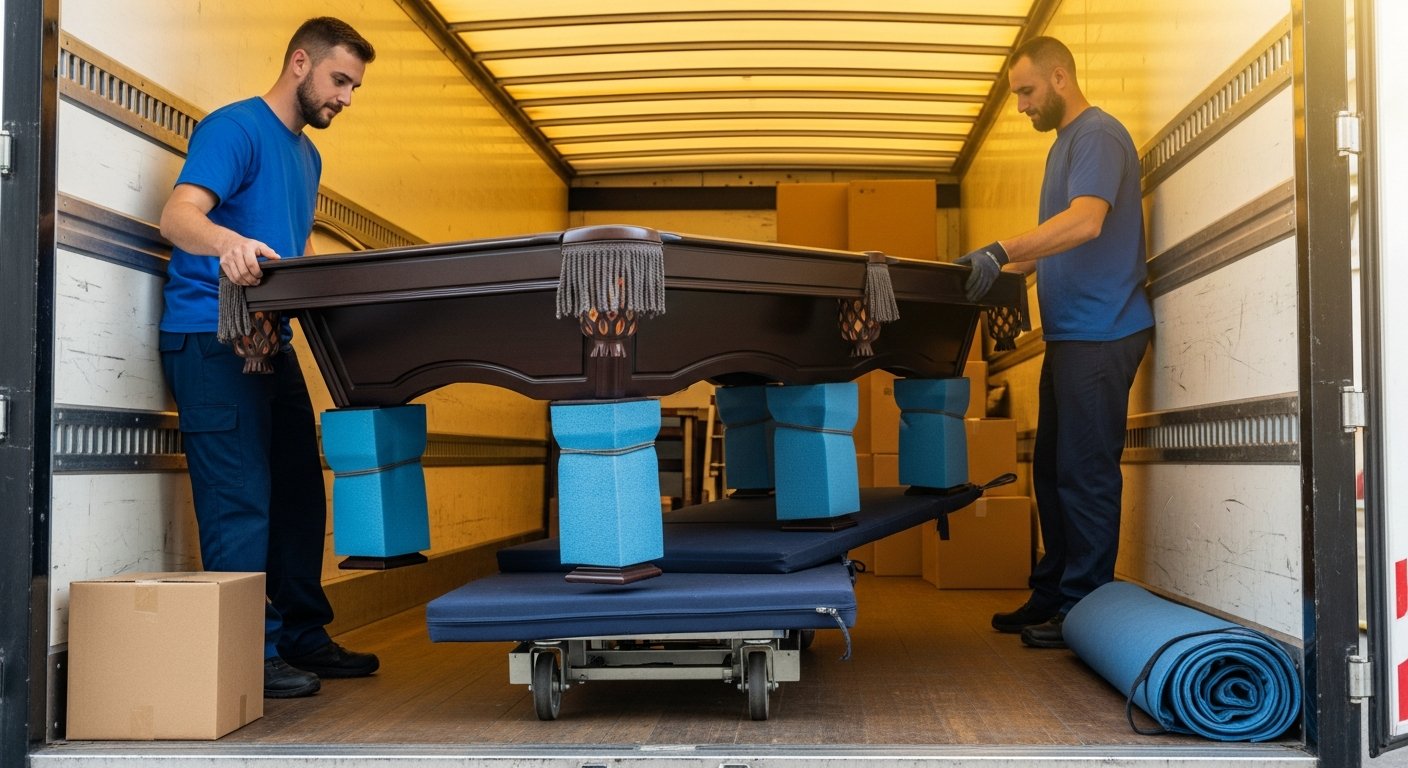
Moving a pool table is one of the most challenging tasks you will face during a relocation. These heavy, precision-engineered pieces of furniture can weigh anywhere from 700 to 1,000 pounds, and their delicate slate bed and felt surface are easily damaged if handled incorrectly. Attempting to move a pool table without proper planning and technique can result in broken legs, cracked slate, or torn felt, leading to costly repairs or total replacement. Fortunately, by following a systematic approach to disassembly and transport, you can protect your investment and ensure your table arrives in pristine condition at your new home.
This guide covers every stage of the process, from gathering the right tools and protective materials to safely reassembling the table after the move. Whether you are a DIY enthusiast or planning to hire professionals, understanding these steps will help you avoid common mistakes and save money. If you decide to enlist help, remember that licensed and bonded movers have the equipment and experience to handle heavy loads like a pool table. For a stress-free move, get a moving quote through Moving Perfect to compare top-rated movers in your area.
Assess the Table and Gather the Right Tools
Before you begin disassembly, take a close look at your pool table. Most modern tables are built with a three-piece slate bed, while older models may have a single slab. Knowing the construction type determines how many people you need and the disassembly steps required. Standard tools for the job include a socket wrench set, screwdrivers (both flathead and Phillips), a rubber mallet, a level, and a felt marker for labeling parts.
You will also need protective gear: moving blankets, stretch wrap, heavy-duty straps, and a dolly rated for at least 1,000 pounds. A furniture slide set can help move the table across floors without scratching. If you are moving the table through narrow doorways or staircases, measure the path carefully. Disassembling the table reduces its footprint, but you still need enough clearance for the slate pieces and frame.
Disassemble the Pool Table Step by Step
Disassembly is the most critical phase. Rushing through it can damage the table or make reassembly impossible. Follow these steps in order:
- Remove the pockets and rails. Start by taking off the pocket liners and any corner pieces. Most rails are secured with bolts underneath the table. Remove these bolts and lift the rails off carefully to avoid tearing the felt.
- Take off the felt (optional but recommended). If the felt is in good condition and you want to protect it, gently staple or tack it to a piece of cardboard and remove it from the slate. Alternatively, leave the felt attached and wrap the slate with a protective blanket.
- Remove the slate pieces. The slate bed is the heaviest part. If you have a three-piece slate, each piece typically weighs 150 to 200 pounds. Use a socket wrench to remove bolts securing the slate to the frame. With a helper, lift each piece straight up and place it on a padded surface. Do not slide the slate as it can crack.
- Disassemble the frame and legs. Once the slate is removed, take apart the wooden frame by unscrewing the corner brackets and leg bolts. Label each piece with the felt marker so you know where it goes later.
Labeling is your best friend. Use a numbering system on both the parts and a diagram. This will save hours of frustration during reassembly. Also, keep all screws and hardware in labeled ziplock bags taped to the corresponding part.
Pack and Protect Each Component
After disassembly, wrap each component individually to prevent scratches, dents, and breakage. Here is a breakdown of how to handle each part:
- Slate pieces: Wrap each slab in a moving blanket, then secure with stretch wrap. Use edge protectors on the corners to prevent chipping. Stack them vertically on a dolly, never flat on top of each other.
- Rails and pockets: Wrap in bubble wrap or felt padding, then store in a large box. Keep the hardware bags inside the box as well.
- Frame and legs: Bundle the wooden pieces together with moving blankets and straps. Protect any exposed bolts with foam or tape.
- Felt (if removed): Roll the felt loosely (do not fold) and place it in a clean, dry bag. Keep it away from moisture or heavy objects.
For your other delicate items, such as electronics or glassware, the same principles apply. Our electronics packing guide for a safe move offers additional tips on wrapping fragile components with care. While that guide focuses on electronics, the techniques for using anti-static bubble wrap and sturdy boxes transfer well to pool table felt and pocket liners.
Transport the Disassembled Pool Table
Loading a disassembled pool table requires a vehicle with ample space. A moving truck with a lift gate is ideal. If you are using a rented truck, consider the total weight distribution. The three slate pieces alone can exceed 500 pounds, so place them over the rear axle for balance. Always use a dolly with pneumatic wheels for the slate; never drag it across the truck floor.
Secure all items with ratchet straps to prevent shifting during transit. Place the frame and legs between the slate pieces to act as a buffer. Drive cautiously; sudden stops or sharp turns can cause the slate to crack even when wrapped. If you are moving long distance, consider hiring professional movers who are licensed and bonded to handle heavy freight. They have the equipment and experience to navigate stairs, tight corners, and long hauls without incident.
Reassemble the Pool Table at Your New Location
Reassembly is essentially the reverse of disassembly, but it requires patience and precision. Start by leveling the floor where the table will sit. An uneven surface will cause the ball to roll off, so use shims to adjust the legs. Then rebuild the frame and legs, ensuring all bolts are tight but not over-torqued (which can strip the wood).
Next, place the slate pieces on the frame exactly as they were. Use a carpenter’s level across each seam to ensure the slate is flat. If there are gaps, use the included shims or slate wax to fill them. Some professionals recommend using a felt-leveling compound under the slate for a perfect playing surface. Finally, reattach the rails, pockets, and felt. Stretch the felt tautly and staple it along the edge of the rails, trimming any excess.
After reassembly, wipe down the playing surface with a clean, dry cloth. Do not use water or cleaning solutions on the felt. Test the table by rolling a few balls across the surface. If they drift, adjust the leveling again. This final step ensures your table is ready for countless games.
When to Call Professional Movers
While the steps above are manageable for two or three strong people, moving a pool table is physically demanding and risky. Common mistakes include lifting with your back instead of your legs, dropping a slate piece, or pinching fingers in the frame. If you have narrow staircases, multiple flights, or a long distance move, hiring professional movers is highly recommended.
Moving Perfect connects you with licensed and bonded movers who specialize in heavy items. These professionals carry insurance that covers damage during transit, giving you peace of mind. The cost of hiring movers for a pool table is often less than the cost of repairing a cracked slate or replacing a torn felt. Compare quotes from multiple companies through Moving Perfect to find a service that fits your budget and schedule.
Whether you choose DIY or professional help, the key is preparation. Disassemble the table correctly, protect every part, and reassemble with care. Your pool table is a centerpiece of entertainment and recreation; treat it with the respect it deserves during the move.
Moving a pool table does not have to be a nightmare. With the right tools, a clear plan, and safe transport methods, you can enjoy your game in your new home without a scratch. Remember to measure doorways, label everything, and lift with your legs. If the task feels overwhelming, get a free moving quote and let the experts handle it.